
No-bake coconut cream pie is a delightful and easy-to-make dessert that brings the tropical flavors of coconut to your table without the need for an oven. This creamy, coconutty pie is perfect for warm days or any occasion when you want a sweet treat that doesn’t require baking.
Why You’ll Love This Recipe
Easy Preparation: No need to turn on the oven, making it perfect for hot days.
Rich and Creamy: The coconut filling is smooth, creamy, and full of tropical flavor.
Crowd-Pleaser: This pie is sure to be a hit at any gathering or family dinner.
Make-Ahead Friendly: Prepare it in advance and chill until ready to serve.
Ingredients
For the Crust:
2 cups graham cracker crumbs
1/2 cup unsweetened shredded coconut
1/2 cup melted butter
1/4 cup granulated sugar
For the Filling:
1 cup heavy cream
1 cup coconut milk
1/2 cup granulated sugar
1/4 cup cornstarch
1/4 teaspoon salt
4 large egg yolks
1 cup sweetened shredded coconut
1 teaspoon vanilla extract
For the Topping:
1 cup heavy cream
2 tablespoons powdered sugar
1/2 teaspoon vanilla extract
Toasted coconut flakes (for garnish)
Step-by-Step Instructions
1. Prepare the Crust
Mix Crust Ingredients: In a medium bowl, combine graham cracker crumbs, unsweetened shredded coconut, melted butter, and granulated sugar. Mix until well combined.
Press into Pan: Press the mixture into the bottom and up the sides of a 9-inch pie dish. Use the back of a spoon or the bottom of a glass to press firmly.
Chill: Place the crust in the refrigerator to chill while you prepare the filling.
2. Make the Filling
Heat Cream and Milk: In a medium saucepan, combine heavy cream and coconut milk. Heat over medium heat until just starting to simmer.
Mix Dry Ingredients: In a separate bowl, whisk together granulated sugar, cornstarch, and salt.
Temper Egg Yolks: In another bowl, whisk the egg yolks. Gradually add a small amount of the hot cream mixture to the yolks, whisking constantly to prevent curdling.
Combine and Cook: Slowly pour the egg yolk mixture back into the saucepan with the remaining cream mixture, whisking constantly. Cook over medium heat, whisking continuously, until the mixture thickens and comes to a boil.
Add Coconut and Vanilla: Remove from heat and stir in the sweetened shredded coconut and vanilla extract. Let the mixture cool slightly.
3. Assemble the Pie
Fill the Crust: Pour the cooled coconut filling into the prepared crust, smoothing the top with a spatula.
Chill: Cover with plastic wrap and refrigerate for at least 4 hours, or until set.
4. Prepare the Topping
Whip Cream: In a large bowl, beat the heavy cream, powdered sugar, and vanilla extract until stiff peaks form.
Top the Pie: Spread the whipped cream over the chilled coconut filling.
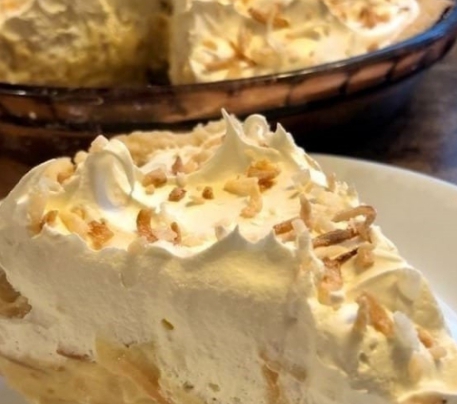
Garnish: Sprinkle toasted coconut flakes on top for garnish.
5. Serve
Slice and Enjoy: Slice the pie and serve chilled. Enjoy the creamy, coconutty goodness!
Tips for Success
Cool Filling: Allow the coconut filling to cool slightly before pouring it into the crust to prevent the crust from becoming soggy.
Even Layers: For a beautiful presentation, ensure the whipped cream layer is spread evenly over the filling.
Toasted Coconut: Toasting the coconut flakes adds a nice crunch and enhances the coconut flavor.
Variations
Chocolate Drizzle: Drizzle melted chocolate over the whipped cream for an added touch of decadence.
Pineapple Twist: Add a layer of crushed pineapple (drained) on top of the coconut filling before adding the whipped cream for a tropical twist.
Nutty Crust: Substitute part of the graham cracker crumbs with crushed nuts like macadamia or almonds for added texture and flavor.
Conclusion
This no-bake coconut cream pie is a perfect dessert for any coconut lover. Its creamy filling, combined with a crunchy coconut graham cracker crust and fluffy whipped cream topping, makes for a delightful and refreshing treat. Whether you’re hosting a summer party or simply craving a taste of the tropics, this pie is sure to satisfy your sweet tooth. Enjoy the simplicity and deliciousness of this no-bake dessert!